Sunday, November 20, 2016

Dryer Blower Wheel Stripped ... a quick solution

My dryer blower wheel shaft "spins out" every few years and rattles when the dryer runs. 


You can tell that blower wheel is lose, or stripped, pretty easily because when you turn off the dryer, you can hear the wheel spinning still ... because it's not really attached to anything now.

It's easy to see why ... plastic wheel ... metal shaft ... the plastic is going to lose every time. They tried to make the wheel more resilient by providing a spring clamp that fits over the plastic hub, but it's still not enough pressure.

Since I needed to get my dryer "back on line", I devised a pretty good solution.  I will order another one and install it but will do this same thing on the new wheel.

Take the old one off (you'll need some snap ring pliers ... like these):


Using a Dremel Drill motor with a 90 degree elbow accessory and an abrasive disk
I opened up the slots that are in the center hub, kind of shows here:
The black marks in the middle show where I opened up the slots.  Then, I put it back onto the shaft, and took a piece of snap blade (about 1/2" long)
and hammered it in between the flat side of the shaft and the wheel (be careful ... sharp ... I used the Dremel grinder wheel to grind the outside straight so I could tap it in).  Then, I took a small hose clamp with a 1/4" bolt head (don't know the exact size as it was just in my junk bin)
and put it over the plastic hub and tightened it.  You'll need a 1/4" closed end ratcheting wrench like this to do the tightening:
Yes ... I know it says 3/4" in the picture ... get one that fits your clamp ... usually 1/4" ... got mine from Harbor Freight.

Anyway, once tight, reinstall the snap ring and put it back together ... good as new ... should last 10 more years until the actual motor burns out.

cheers

tpg


Thursday, November 17, 2016

The AWS-3 Auction and the Spectrum Reallocation Fund ... ITC2016

I attended the 2016 International Telemetry Conference in Glendale Arizona.  On Tuesday the 8th of November 2016, Mr. Derrick Hinton honored us with a presentation on the funding that is occurring due to the AWS-3 Auction and the impact of the Test Ranges.  I was so impressed with the presentation, I contacted Mr. Hinton and asked for a copy of the presentation and permission to post it on my blog so that it got some additional distribution.  

I guess it starts off with a bang in that the USG thought it would bring in from 10 to 18 billion, but instead it brought in 43 billion.  So from that, funding is working it's way to the ranges.

PDF File is here

This is shared by permission of it's author, Derrick Hinton, and retains all copyright.

Wednesday, October 19, 2016

GPS and Cell Phones

There seems to be some misunderstanding when it comes to GPS and cell phones.  I have found posts which say "GPS is GPS" and others that think "just ask your provider".

First ... remember this ...

In the frequency allocation filing for GPS signals, the L1 C/A power (that the commoner uses) is listed as 25.6 Watts (14 dbW).  The Antenna gain is listed at 13 dBi.  Thus, based on the frequency allocation filing, the power would be about 500 Watts (27 dBW).


Now, the free space path loss from 21000 km is about 182 dB.  Take the 500 Watts (27 dBW) and subtract the free space path loss (27 - 182) and you get  -155 dBW.  I remember reading that this is analogous to trying to read a book in the dark, but with one candle lit 100 miles away.  Bottom line ... GPS is a weak signal.

The receiver that accepts that GPS signal is influenced by software processing, cost of GPS chips, the noise that is generated in the front end receiver section of the chip, and the noise in the demodulation section, as well as the actual antenna that receives the signal (and it's size and cost).  

So, when testing and measuring a receiver, you spec things like capture performance (what signal level takes how many seconds), MDS (minimum discernible signal), and tracking performance ... and NONE of that is listed on OEM web sites.  Thus, we haven't a clue how good a phone is.  

If I were to GUESS, I'd say that the more you pay for the phone, the better the GPS performance will be.  The phone I used for my WAZE display is a LG Volt LS740, and I can tell you that it's GPS capability is worse then many other cells I've tried ... but it's good enough during dry and clear conditions.  Give it fog or rain, and the signal capture is very poor.

If you want the best GPS signal you can get with a cell, consider adding on the blu-tooth accessory ... like the XGPS150A ... it is a GPS receiver, dedicated, and provides a better GPS signal to your phone.  Or do some googling and find sites that say the iPhone has the best GPS receiver.  Bottom line ... it's a guess.

Thursday, September 29, 2016

WAZE and the ultimate display ?

OK ... maybe "ultimate" isn't there (ultimate would be a combining glass), but this is REAL close.  

I first tried mounting a 7" tablet in the center of the car console, suspended from the CD slot (holders available in eBay), but I found that to be too large as it got in the way of the radio. So I removed that and just used my phone ... which is a Samsung Galaxy Note 3 (sometimes it would lose GPS lock by sitting/lying on my seat ... or being in the cup holder).  I decided that the ideal spot for a display was right above my "4 wheel drive" button, to the left of the radio, because even if it got in the way of that button, I only have to press that button once or twice a year in winter (to get in and out of my driveway).  After looking at a few ways to mount a cell phone there, I decided on the WizGear unit:


The WizGear applies a flat metal piece (using double-backed tape) to the phone, and the round mount uses a "rare earth" magnet (Neodymium), and while I don't know it's gauss rating, all but the heaviest cell phones will stay in place.

Now, with the WizGear, the mounting for it assumes a flat surface, and the RAV is NOT flat there ... it is slightly curved.  So I used a piece of 3M 5952 Black VHB double-back foam tape on one half of the existing mounting tape, which gave it an orientation closer to "curved" ... and mounted it above the "4 wheel drive" button.

I tried using my phone, but it has a 5.7" display, which puts it into "phablet" territory ... and that size was too large.

I decided the answer was a smaller phone ... but I like my "phablet" (and wasn't going to change) so decided to use a "mini-tablet" ... and that is a cell phone.  So I searched eBay for "bad IMEI" (which means it cannot be used directly as a cell phone, but it's WiFi and BluTooth work just fine) and found an LG Volt LS740 with a bad IMEI ... it only costs $30.  


While my ageing eyes cannot read everything on the display, I find that I only need to hear the prompts ... and see if the next move is a right or left turn ... which even in this crappy picture, you can see easily.

To get power to it, I ran a power cord up, but it took several days to do that because I had to use Silicon cement ... but could only apply it about 3 inches at a time due to the curves involved.  So I taped the cord in place, and would glue only 2 to 4 inches of it every 24 hours.  Then, when that would dry, I'd apply different tape and glue another 2 to 4 inches.  After about a week, the whole cord was in place and secure.

Living with the LS740 cell phone didn't work out ... that model is crap ... lousy GPS signals, bad data points (Waze would always generate bad information, assuming I had transported 200' to a side road).  But it proved that the architecture would work ... and work well.  And while GPS ratings are NOT available on cell phones, I did find evidence that the Nexus 5's GPS is very good ... so I found a "bad IMEI" Nexus for $60 and installed that in place of the LS740 ... huge improvement in reliable GPS.

This has made me a much safer driver because now I don't ever need to look down to see my cell on the seat beside me, and the GPS directions are always right ... Waze is instead right in line with my vision ... and it's easy for me to hit the necessary points on the GUI to report accidents or to thank someone who has spotted something of interest.

UPDATE:

Other day, I was driving to work and I took this picture from the drivers seat:


You can clearly see my Waze display easily "in view" while if you zoom in on the drivers windshield in front of me, you'll see his cell phone and charger cable in his way for good vision:
LOL ... he's going to get a ticket driving like that.


Saturday, August 27, 2016

SHB, or Secure Hardened Baseline

Overview:
On November 20, 2015, the DoD put out a memo affecting all computers and computer-centric systems.  It mandates that all computing equipments that runs Windows must run Windows-10 ... and not just Windows-10, but Windows-10 Secure Host Baseline, or SHB ... and security is provided by "Level 2" STIGs.

Security Technical Implementation Guides (STIGs):
STIGs are guidelines on how to setup the configurations of software, and they are available for most of the common software and applications we all use daily.  What is not generally known is that STIGs come in two (2) levels ... first, there are the STIGs you and I can get (PA, or Publically Available), and the second level at the ones that require a CAC card ...they are FOUO, or For Official Use Only.  

The Differences between the STIGs:
While I do not know (or could even talk about) are the "exact" differences, but people I have talked to say, basically, "If you implement the PA STIG,s, the 'vast majority' of FOUO STIGs are addressed".

When is SHB required?
The memo I talked about at the introduction says it best ... repeating it here:

This memo serves as notification that the DoD will direct Combatant Commands,
Services, Agencies and Field Activities (CC/S/As) to rapidly deploy the Windows 10 operating system throughout their respective organizations starting in January 2016. This applies to all DoD information systems currently using Microsoft operating systems. The Department's objective is to complete the deployment by January 2017. The CC/S/A's are encouraged to begin planning for this upgrade to include developing cost estimates.

The Defense Information Systems Agency (DISA) and National Security Agency (NSA)
are co-leading ajoint Secure Host Baseline (SHB) working group to prepare a Windows 10
Standard Desktop framework. The WIN 10 SHB will bring consistency to DoD host security
configuration management activities and will be available to CC/S/A's on DISA's Information
Assurance Support Environment Portal site at http://iase.disa.mil, in January.

A Secretary of Defense Execution Order will be forthcoming with details on the release
of the Windows 10 SHB. Once the order is published, it will be CC/S/A's responsibility to
implement and promulgate the image across their respective organizations by January 2017.  CC/SIA Chieflnformation Officers will have limited waiver authority over their respective implementation plans on a case-by-case basis for up to 12 months. Any waivers over 12 months must be approved by the Department of Defense Chief Information Officer (DoD CIO).

What I have been told is that waivers will be almost impossible to get, and that anything that has Windows on it, WHETHER OR NOT IT IS CONNECTED ON A NETWORK, must have Windows-10 and the SHB.  

Validation:
Another interesting part is the STIG validation. As you research this, you'll find XML files to help you validate.  But what I found interesting is this ... suppose you are implementing the STIGs and you get to the STIG that says something like "Support Floppies" and the STIG says "set to NO".  When you validate your software, if you have not changed it from YES to NO, the fact that it is set to YES is a "finding" ... a point against you.  Now the interesting part ... if you don't even find the setting in the registry, that is a "finding" as well, and a point against you.  Therefore, in this case, you MUST CREATE THE FIELD IN THE REGISTRY AND SET IT TO NO ... because not having it in there is like a YES ... and it is a finding.

Hope this helps someone.

Wednesday, June 29, 2016

Finding Polybutylene (PB) pipe

Found a small section of PB pipe in my house ... supply to the dishwasher.  The dishwasher sprung a leak, and I decided to replace it rather than fix it.  

Researched PB pipe and found out:

1) it's mostly the chlorine and UV that caused the problem.
2) I have a well, so no chlorine
3) the only PB pipe is under the counter, so no UV
4) thus, I can leave it if I want.
5) Even though PB fittings "seem" to work with pipe thread, the thread pitch is different.
6) I left the PB connection to the water lines in place and just used the PB pipe, about 8 inches, as a stub out.
7) Slide on a SharkBite U4008LFA fitting on the PB side

So, continuing on ... 

8) On other side of fitting, installed a 1/2" PEX line (SharkBite U860R2)about 12" long
9) On the 12" PEX, installed a BrassCraft model G2PS14XC1 valve with a 3/8" compression on other end, which then goes to the dishwasher line.
10) And as most surely know, dishwashers use a garden hose connection, so you use a dishwasher connection kit with the elbow and 3/8" hose you need.

Friday, May 2, 2014

Retrofitting a Kubota B6200 Tractor ... or ... Percolator to Water Pump

In the early days of Kubota, many of their machines were designed with a percolator cooling system. My Kubota B6200 is an early model and indeed, one of those.  While it's been a great machine, the radiator sprung a leak and you cannot find the radiator (or easily find a shop anymore that will fix them).  You see, pre serial number 60000 used the 15751-72060, while later ones used 15531-72060 (the big difference you can easily see is that the early ones have the top hose connection straight in while the later ones have the top hose coming out at a 45 degree angle).  In looking into the situation, I found a junk dealer that would sell me the parts to change the front gear cover so it would have a water pump.  Some lessons learned include:
  • your going to need to build 2 custom tools out of sockets (more on that later).
  • using heat to expand parts works better than anything for removing stuck parts
  • use taps and dies to clean all your bolts and threads before putting everything back together.
  • The fitting in the side of the engine is a 1" 11.5 TPI part, so instead of buying a tap and die to fit those, to clean up the threads, I bought regular pipe nipple and cape, and cut grooves into them and made a poor man tap and die.
  • Use Messicks for parts (they send parts breakdowns in PDF ... very handy).
  • don't rush.
Tear down:

For tear down, drain the oil and water.  Use an impact wrench for most of the large bolts.  The hardest part of the tear down was the harmonic balance wheel (060) and front PTO flange assembly (090).  The mechanic told me they slide right off, but mine were too tight for that. When you get the radiator and front grill off (you need the room, so spend the extra hour and remove them), you take out the three bolts on the front PTO flange (100 & 110).

Now you have to put a torch on the PTO flange and get it good and hot.  Then, I tapped the top front of the PTO splines, rotated the crankshaft 90 degrees and tapped it again, then another 90 and tap ... and just continue until you see the flange start to separate from the harmonic balance wheel.  Then, I slide a large flat tip screwdriver between the two and both pried there, as well as grabbed the flange with gloved hand and while rocking the flange, pried them apart (no rust ... just a tight fit).

Then, remove the center bolt on the harmonic balance wheel and use a wheel puller to get it off. Again, a mechanic told me it too slides off, but I needed a wheel puller.


Once those are off, you start taking off all the parts that obviously come off.  The parts you'll need are:

From Autozone, a Duralast 15340 V belt (old one is 31" ... you need a 34" belt)
15531-72060 - Radiator (got mine from a junk yard, but new ones are available for a few dollars more)
15752-04020 - Gear case front (got mine from a junk yard)
15531-72910 - Water Flange Assembly (got mine from junk yard)
15973-64010 - Dynamo (old one will not work ... junk yard part also)
16851-73270-620 - Thermostat Gasket
15676-73430-620 - Water Pump Gasket (replaces 15531-73430)
15676-04130-620 - Gear Case Gasket (replaces 15676-04130-620)
15296-88130-620 - Engine RPM sensor (replaces 15221-88130)
15263-72920-620 - Water Flange Gasket (replaces 15261-72920)
04811-06130-620 - 3 each ... O rings
15531-73013 - Thermostat
15531-73350 - Top Return Hose
15752-72850 - Bottom Return Hose (short one)
15877-04140 - Crankshaft Oil Seal
15752-72940 - Radiator Hose

The hardest part was the crankshaft oil seal.  You see you need both the newer one and the older one.  You remove all the rubber from the new one, tap or press it in, and then the older style smaller one presses into that.

As long as all surfaces are clean, you won't need any RTV or gasket sealer.  Torque all 10MM bolts to 7 ft lbs and nothing leaked.  Pressure test your new radiator ... AutoZone rents out pressure testers for a deposit, but free as you get the deposit back.

Runs great.  Nice and cool.

Thursday, October 10, 2013

ODB-2 Port

Well, I finally decided to buy my own ODB-2 port reader, and decided to go "on the cheap" ... so I went on eBay and bought this for under $11 (free shipping from China).


After the customary 2 weeks of waiting (can't complain ... free from China), I inspected the CD and found two directories:
- USB Driver
- scantool_net113win

My machine is a Windows-7, 64-bit machine ... and I'm used to having "issues" with new software.


So first, I installed the USB driver, then the ScanTool.  Note that ScanTool is an open sourced product here:

              http://www.scantool.net/downloads/diagnostic-software/


This version is 1.13, but there are new ones that I'll talk about shortly.  So, n
ext, I installed the ScanNet software and got an error:


I tried everything to configure the port, and the seller in China had no idea how to fix it ... wanting me to send it back so they could ship another.  Knowing that it's a software configuration issue, I decided to troubleshoot it myself when I could be methodical.


First, when you install the USB driver, you need to wait awhile until the device manager clearly shows which of the COM ports the USB driver takes (don't just accept the notice of "your device is ready" ... look at the device manager.  For me, it took number 8 (the Prolific USB to Serial Comm Port).  Of course, you can click to the Advanced section of the COM driver and change it ... but 8 is available in the ScanNet software.  Also, note the baud rate from the driver menu because you'll need that.


Now that you know the port number, baud rate, and know that the drivers are completely installed and registered, you need to re-boot ONE MORE TIME so the drivers are all setup and in place.  Now, install and/or run the software and if it does not find the device, it will prompt you to which port to use.  I selected 8 and the correct baud rate ... and it worked fine.


Now, if your like me, you wonder "is there newer software available?" ... and yes there is (at the link above) but when you install it and run it, you'll get an error of:


        "Your device does not appear to be a genuine ElmScan5" ... and

        "ELM327 clones are no longer supported".

Well, in the file "main.c" of version 1.14 and beyond, there is a line of code 


   is_not_genuine_scan_tool = FALSE;


that looks for the ODB readers make by others.  If you want to download the source code, change the line to:


   is_not_genuine_scan_tool = TRUE;


and re-compile, I'm sure it will work ... but I don't know how so I'll stick with 1.13 for now.

Saturday, May 18, 2013

Secret to good Appliance Paint Touch up

First, buying epoxy paint in the little bottles is easy ... and color matching is pretty good.  The problem I've always had was applying it without a big "glop" over the chipped area.  My approach is (after you've done your preliminary cleaning and shaking the bottle really well) is to put a large piece of painters tape NEAR the chip ... that's your "paint board".  Using a second brush, smear some lacquer thinner on the paint board, then using the brush that is in your bottle, move a small amount of epoxy paint to the paint board and mix it up ... you want to thin the mixture out a bit.  Then use the thinned paint and apply a thin coat on the chipped area.

Now, shield your paint board (I keep a can of vegetables nearby to set over it) and blow lightly on the chip to dry the epoxy paint (takes about 30 seconds).  Then, go back to your paint board and pick up a little more thin paint and apply a second coat.

Naturally, you might have to repeat the lacquer thinner step a few times if the solution dries out, but applying several thin coats works much better than applying it straight from the bottle.

Proximity Search

First ... definition.


In text processing, a proximity search looks for documents where two or more separately matching term occurrences are within a specified distance, where distance is the number of intermediate words or characters. In addition to proximity, some implementations may also impose a constraint on the word order, in that the order in the searched text must be identical to the order of the search query. Proximity searching goes beyond the simple matching of words by adding the constraint of proximity and is generally regarded as a form of advanced search.
For example, a search could be used to find "red brick bed and breakfast", and over 2.3 million hits ... and I'm no closer to finding what I really want.  By limiting the proximity, these phrases can be matched while avoiding documents where the words are scattered or spread across a page or in unrelated articles in an anthology.


Back in the day, AltaVista was THE search engine for the uber-geek ... and the main feature it had was a "proximity search" call ... NEAR ... and man does that help a lot.  

Google has a very much unadvertised search term ... AROUND(n) ... and it's a proximity detector (and I'm oscillating as I write this because it will make my search easily TEN TIMES more accurate).  AROUND has several features I need to document.   First, the (n) is the number of words to look NEAR the terms.  Also, if you put QUOTES around the whole search term, you're telling Google that the first term has to come before the second term.

From "www.netforlawyers.com", the Google proximity connector AROUND(n) must be placed in upper case as illustrated in this explanation. By replacing the “n” with a number, you determine how many words you want your keywords to be from each other. For example, when we searched for:
     carol levitt
we got 844,000 hits.
When we search for:
     carole AROUND(2) levitt,
we retrieved 281,000 results where carole was within 2 words of levitt. While better, the results consisted of results like this:
  • Carole A. Levitt
  • Carole Ann Levitt
  • Carole Levitt
  • Nancy Jo Levitt
  • Carol Suzanne Levitt (notice the name carol was retrieved)
  • Alain Levitt, Carol Lim
  • Joseph Gordon-Levitt inexplicably performing Carole King's classic “You Make ...
To conduct an even more targeted search, try enclosing your proximity search within quotation marks. Our search for     “carole AROUND(2) levitt”
retrieved 22,600 results. This search only retrieved results where the exact name carole preceded the exact name levitt (with up to two words in between carole and levitt). It disregarded any documents that included various spellings of carole and levitt while the earlier search, without quotation marks, retrieved results with spelling variations for carole and levitt.


Saturday, March 31, 2012

1998 Ford Explorer O2 Sensor replacement, Bank 2, Number 1

It's right at the input to the converter on the drivers side.  Comes off with a 7/8" wrench, or use the special O2 socket you can buy (I didn't need it).  Two important notes when doing this ...
  1. They say to make sure you put anti ceasing compound on the threads when re-installing, but mine came with the compound ALREADY ON the threads (so I spent a few dollars for no reason).
  2. The connector is behind the engine, up against the fire wall.  You remove the drivers side front wheel plus the curtain behind the wheel.  Then, you can reach in and remove the connector.  This last one took me an hour of attempts and 'googling' to find.
Now, no more check engine light.

Wednesday, February 9, 2011

Jody Drill Team

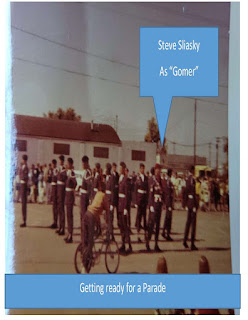
In 1970 and 1971, I was on the Jody Drill Team at Lowery AFB, outside of Denver ... joined it because I didn't want the hassle of inspections and marching to class ... still have my blue and white "rope" I wore to distinguish myself as a member of a special group.  

Remember names like Zac Richardson (?), and my room-mates "Joe Nicoletti and Mickey Donnelly".

Loved it ... loved the travel and competition.  Will post pictures of different people whenever I get them:

Here we are marching in early 1971 ... I think that's our commander "Zac" (back to you) at the time:


"Gomer" Tim Curran (left) and Commander Jon Stalnaker (center).  On the right is a guy who I think was named "Beasley"


Also:


Found a picture of me

Here is a picture of Ed Coleman (on the left) and Joe Nicoletti (my room mate) on the right:


My other room mate, Mickey Donnelly:


Joe Nicoletti sent in this picture of us in full uniform, on the practice field:


Here's some pictures Steve Sliasky sent in:


You can email me at tim.gatton@gmail.com


Sunday, November 7, 2010

Thursday, July 22, 2010

Tractor Parts


Have a Kubota B6200 diesel tractor with a B1650 front loader ... the controller for the front loaded got loser and loser. Went to a local shop and the sent me to call a used parts reseller ... no joy.  So then went to the dealer and the the hydraulic controller wasn't available ... out of stock. So I went to the local rebuilder and they could not find parts for it. So it was up to me ... the unit is part number 27FABS6M1AB (was actually so dirty that I thought the number was 27FAB56M1AB), and was made by Victor Fluid Power, which was out of business in the 1980s. The people there opened under a new name, called Granite Fluid Power (www.gfpmf.com) but they sold off the 27FAB line to DanFoss. Then DanFoss merged with Sauer and now they are Sauer-DanFoss (www.sauer-danfoss.com) ... but they sold it off to QC Corp (www.qccorp.com). Contacted them and found out that the valve is available for ~$700 as their part number 156B2126. Ouch !! So I then asked for a re-build kit, called a Detent/Float kit ... and that part number is 156B8566 ... and it's under $70. Delivered the parts to the re-builder and for $120 to them, now have a new controller.  No leaks ... tight ... works great.


.

Tuesday, September 8, 2009

My Home Network

My network looks like this:

The router settings are:


Search This Blog

My Passions